Research: Studio Muti window display
Images:
behance.net/muti
Laura Carlin
Images:
http://www.heartagency.com/artist/LauraCarlin/gallery/1
Research: Alaska in the 1920s
Photographs:
http://old-photos.blogspot.co.uk/2010_05_01_archive.html
http://www.nps.gov/history/history/online_books/olym/hrs/chap2.htm
http://www.nps.gov/history/history/online_books/ania/hrs/chap7.htm
http://www3.familyoldphotos.com/photo/pennsylvania/24083/bernard-ben-charles-benson-in-alaska-1920s
http://www.skagwaynews.com/alaskan2003.html
http://www.alaska-in-pictures.com/scenic-wilderness-landscape-tutka-bay-lodge-homer-alaska-7060-pictures.htm
http://www.kuriositas.com/2011/07/alaskan-summer.html
http://travel-photography.photoshelter.com/image/I0000jwEo0B0.Nyw
http://www.city-data.com/forum/members/bs_alaska-304145-albums-juneau-alaska-pic5491-mendenhall-gracier-winter.html
Guest Lecture: Carolyn Gowdy
Images:
http://www.facebook.com/carolyn.gowdy
Further research and tutorial
Photographs:
Christian Bolkanski image:http://artplafox.blogspot.com/2010/11/6-eme-montrez-le.html
http://zepizzabox.blogspot.com/2011/07/sapotille_29.html
theatre illustion:http://www.cabinetmagazine.org/issues/24/Warner.php
forkbeardfantasy.com
Book:
Eyes, Lies and Illusions, 2004, Laurent Mannoni, Werner Nekes and Marina Walker
Research: Theatre sets and shows
Photographs:
http://www.matildathemusical.com/
http://www.quentinblake.com/en/
http://blog.lauraashley.com/go-see/curtain-call/
Video:http://www.youtube.com/watch?feature=player_embedded&v=oM-6DQCKxJE
http://warhorseonstage.com/tickets/london
http://www.birmingham-rep.co.uk/event/his-dark-materials-part-one
Research: theatre in illustration
Elly MacKay: http://www.ellymackay.com/
Video: http://www.youtube.com/watch?v=yedD4JsZyT0&feature=player_embedded
Other images found on tumblr.com
Bruce Ingman
Image:
http://www.bruceingman.com/
Friday 18 May 2012
CV
I wasn't actually aware until recently that we had to include this CV in our presentation document, so I will admit it's a bit rushed.


If I had had more time I would have put more work into the design. I wanted to put in information this is relevant. After this final major project I would have more exhibitions to include so I think that would be a good reason to amend this one.
Summary
I've enjoyed this project in the most part. There's definitely been some ups and downs. I think it was a bit slow starting as I didn't have a full idea of what I wanted to do at the start of the project and once I had chosen I didn't know what it could culminate in for some time.
I think I've pushed myself to explore new ways of working and to develop my work with paper and to explore opportunities with other materials which I think has been successful.
I think my influences have stayed strong throughout, including theatre design and model creation; like Forkbeard Fantasy, I feel in hindsight my fox has been influenced by seeing those models earlier.
I've enjoyed finding new research, artists and work along the project; like the window display for the e.e Cummings poem.
I think it would have been better to of had a clearer idea and outline of what to create sooner in the project; I wanted to give myself time to develop and change too but I think having a more detailed starting point would have been beneficial from this end of the project.
I think without all my final pieces completed it's hard to judge how it culminated but I have a good feeling about the pieces I have made and am pleased with how they look. I like the mix of using literal scenes from the book but also using them to create impressions of the characters and to foreshadow events that come later. I remember something Quentin Blake had said 'illustrate the moment just before or just after a scene' which was something I've had in mind for the creation of my images.
I think the way I've created the imagery has been in keeping with the style of writing; there is a mix of fantasy and reality and I think with creating set like pieces with staged scenes and light and shadow the two connect well and create a good atmosphere of the sense of place and climate.
Over the past 3 years I'm pleased to have developed into a way of working which I find fun and engaging. I think there is a lot of possibilities to explore and experiment with and I don't feel like I've set myself in a single way of working. I feel there are lots of opportunities to try new things and can adapt my way of working. I feel confident that the work I do produce has a running style with either drawn work or paper cuts. I think some of my work from this project has veered off from that style but this was for experiemental purposes. I look forward to creating new work in the ways I have developed at my time here at uni and in this project.
I'm looking forward to having this project finished and to setting it up in our show. It will be a good end to the past few months work.
Thursday 17 May 2012
The final hurdle.
I've hit a bit of a brick wall in this last week as recently I've just come down with I think, stomach flu. I've been a bit frantic as we're coming to the end of the project anyway. I decided yesterday to stop and sleep as there was no point making myself worse.
It's meant that I haven't been able to go and get my fox model or first image photographed like I had hoped but I think the reasoning is fairly understandable. I had trouble finding the photography studio as renovation has meant it's been moved. I had planned on going back in today when tutors were in to ask but I've been worse today.
This means I won't have my final pieces photographed by the time this blog has to be handed in which is a shame but I can't go that far from my room at the moment. I had also planned on getting my other two images completed yesterday and today.
I will hopefully get my pieces photographed on Monday and Tuesday next week. I will have to do separate appointments anyway as I can't carry all work in at once.
Saturday 12 May 2012
Interior illustrations development; shadows
I've started work on other images for my final as well as I want time to develop them. A few weeks ago I made this;


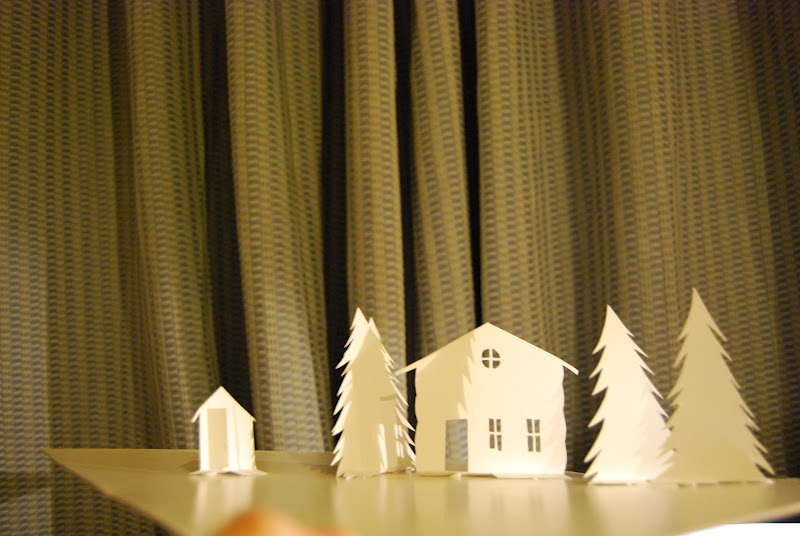
The content relates to the novel but I was really using something that I could create quickly. I've had the image of the cabin and outhouses for a while but never really knew how to develop it and not just make it literal. There are various parts in the story that centre around the homestead but I couldn't see how to create an image that wouldn't just be what happens on the page.
This flatter paper work I think works nicely with the model's I've been making. There are other options with this work as well; scene creation and more conceptual compositions. In this story a lot of the events foreshadow future events. The symbolism is quite situational, for example to fox being shot goes on to symbolise Faina's transition into civilisation, and there are less similies and metaphors used to create meaning and symbols. The girl runs into a flock of white ptarmigan and when I read this is stood out to me in terms of visual imagery and in foreshadowing and symbolism. Birds represent freedom a lot of the time and I think them scattering at Faina's running is significant as straight after she fully accepts communication with other human beings and begins to grow up and experience human traits including losing her virginity and the colour white is significant to represent innocence.
As the message and story is shown through events I thought it fitted well with the almost 'set' like image making and paper cut work. Paper cuts train you to think more in terms of composition, and how it will all stay together. Separate pieces is slightly easier to piece together and bring in new aesthetic qualities like shadow and viewpoint.


I thought when I photographed the model there would be shadow in the image as well. I did this to see what shadows it did make and I think it describes the shape quite well, you can still tell what it is. When I come to photograph this for my final image I think I'll experiment with lighting it and seeing what effect that has on the image. You can't really test out before hand and will have to spend some time once I've actually got the equipment.


On to the image I mentioned earlier, the white ptarmigan. This piece has two layers of scattering birds which will create shapes through the paper and a mix up of shadow behind it. I've used the same paper that I made the fox from and will paint over some sections in muted colours to break up the white, the colours also relate to the descriptions in the book.

This image is a little blurry as I couldn't focus with my other hand but you can sort of see the different shapes and shadows created by layering the images.

Laid out flat I just ordered the pieces to place them.

Here is a wider shot of the whole scene. I added a boy as in the story the boy, Garett, is there with her as she runs into the birds. I also made a few smaller pieces of a few birds to put in front of the running girl. I don't know whether I will use all the pieces I've made but decided to make them to play around with. I can also set up a whole scene and crop in when photographing like I have done below.


I made her dress blue as although she wears a coat in this scene I thought it would make the body too bulky, I like the movement in the dress material and in the story it isn't unlikely that Faina could run around in the snow wearing just a dress. The balls flying around from her boots are to indicate moccasins which she always wears.

I'm really please with how this image looks as though it is coming together. I have to create my other images first and then take them to be photographed with proper equipment. I think I'm going to have to spread out photographing everything as it will be a lot to carry.
Friday 11 May 2012
Model Fox: Adding body
I've started adding paper to the fox model as time is moving on. I decided to go as I had done before and start putting pieces together and see how it all went. It's a lot easier to see how things work when you have pieces infront of you to fit together so I used drawings in my book to help aid the features and shapes but also adjusted things as I went along.


I just started shaping pieces and putting them together. I wanted to make sure I got the eyes in the right place and the right slope of the snout. I could add the sides of the snout once these where in place as it would help with proportion.


At first I was getting the rough shape, and creating sections of the head where contours change, like the long side of the snout into the curve under the eye and around the head as seen in the bottom photo.

Progress made at the end of day 1.


I went through a few different choices for the nose. Here the first way was to create full folded shape with a tab at the top and sides which curled around and were glued to close. I thought I could do better, but didn't quite know how so I left it for a bit. I also took the ears off as I could see they were too small.


I painted the pieces already attached to see what a finished piece would look like a little better and also if I added parts on top it would be harder (and messier) to paint underneath.
Then I came across an artist called Anna-Wili Highfield and cried.


I am so in awe of her work. I love the way she has created creatures with great attention to their shape and movement and still retained a handmade aesthetic. For bigger pieces there are larger bits of paper like the horses neck and with the birds, like the sparrow the pieces of paper are much smaller and piece together. This is something I can take from seeing this work; the paper tends to bend easier for bigger curves and shapes.


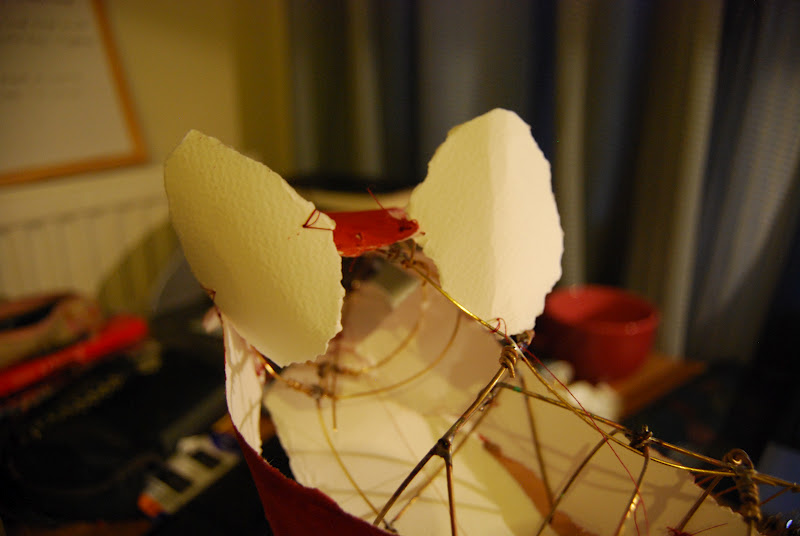
I worked out a better way to add the nose, I ripped a piece of paper into a 'T' shape and folded around the corners to create the nostrils. I prefer this way as it's more in-keeping with the way of making the rest of the head and chest. the parts where you can see through are similar to Highfields work, and I like how the shadow creates the depth. This was something I had hoped to do with this model. I've noticed on the eyes the brass hoop behind curves around and gives a slight hint at an eye shape which would be nice to pick up when photographing it.
I've also started adding the chest area with larger sheets of paper. I was really concentrating on creating the turn in the neck as the fox is looking around, they have quite large necks and chest which come straight out from the head almost.


Towards the end of day 2 I began wrapping thin wire around the hoops on the tail so I can attach strips of paper for the bushy tail. I tangled it quite a lot so it should hopefully hold it's place when I tie thread to it. The trouble with the brass wire is that anything tied can just slide and fall at the bottom. I created this makeshift mesh to attach the tail to. At the moment it looks slightly alarming and reminds me something in Alien.


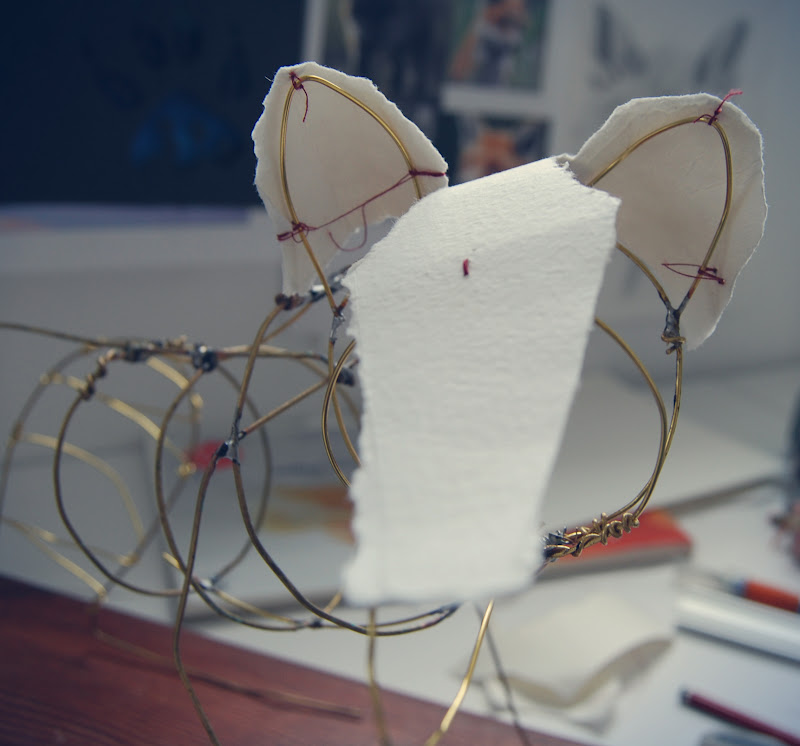
End of the 3rd day and I've redone the ears, added a lot of the body and am happy with the nose. I've removed the sides of the snout as I want to redo them in a better fitting size. I did have a big strip of paper folded under the top of the snout and attached so it appeared either side but that didn't really suit the face. Now I have the shape needing to be filled I can adjust paper to fit it.
I've put this to one side for the moment to look at other pieces of work. I think it will be better to come back to it fresh.
Sunday 6 May 2012
Model of fox: creating the base
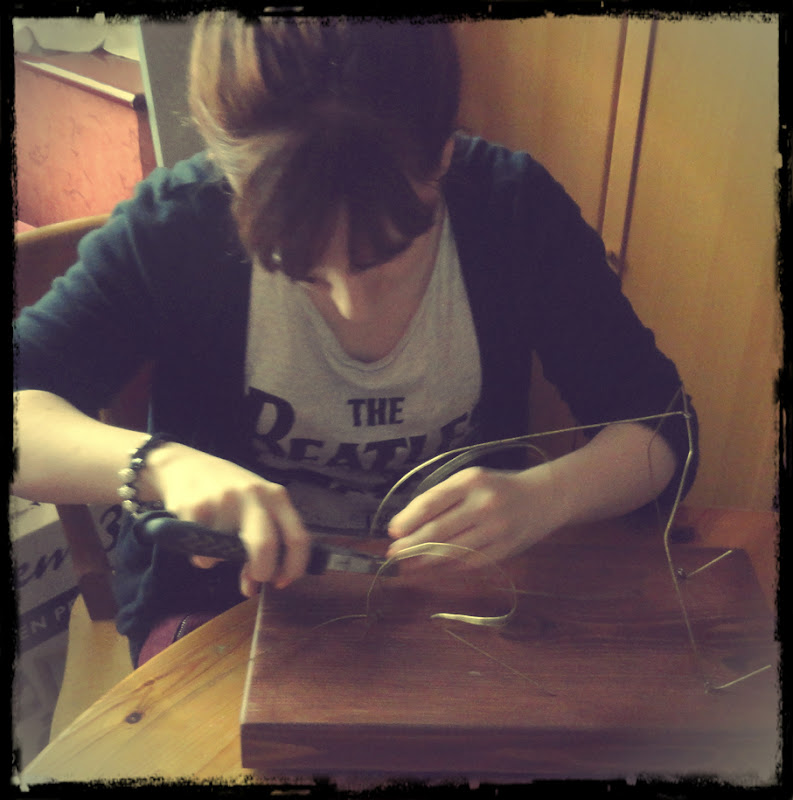
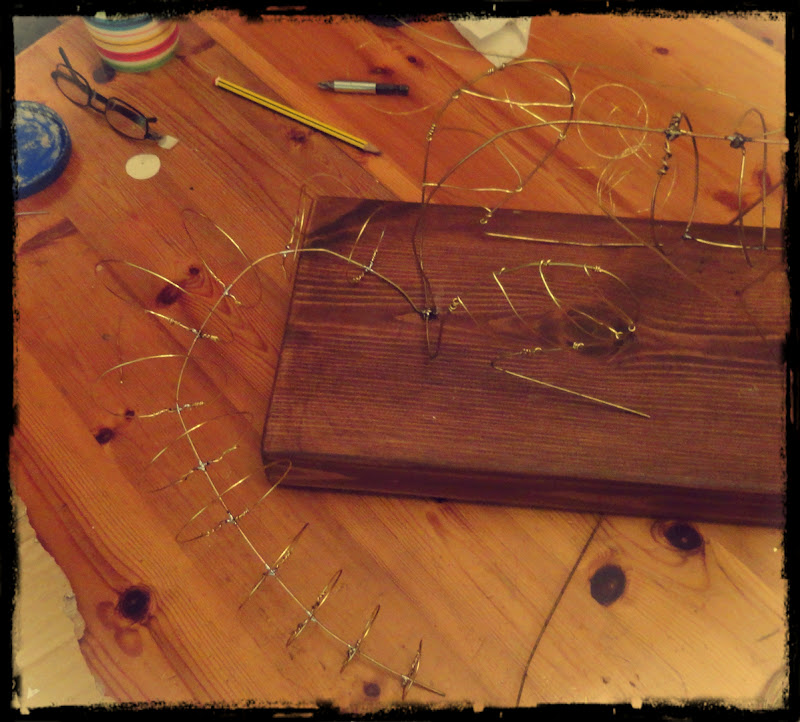
I've begun creating the base for one of my final pieces. After experimenting with the brass wire I've been able to figure out ways of creating different pieces for the body of the fox model I am currently making. I decided that with all the planning I can do it's probably best to go ahead and start working. With previous knowledge of connecting paper and how to construct proportions reasonably well I thought it would just be best to get started and make adjustments as I went along. I had a rough assembled model of the shape of the figure I wanted to make at about a third the size so I could use that to estimate how long pieces had to be and adjust to the size of the wood base I had for it. Here is my journey through making it in photos.

This was done at my parents house where my dad is in the middle of building a new shed. His work involves going to building sites frequently and he has a lot of contacts with wood yards which got him these shelves for said new fence. It also got me this little off cut and varnish to paint over it. I left the sawing to my dad, who cut it down to size. Then it was sanded over lightly and sanded slightly more at the edges to curve them and make them look a little more professional. I found all equipment really easy to use; they were all my dads own tools and everything I had seen him use before.

I found some 'non-slip' felt that is meant to go on the bottom of our sofas' to protect the wood flooring. I stole all I could find so I hope we don't lose any that are of the sofas protecting the floor at the moment. I stuck them on the bottom to raise the base, and placed it on the table where it proceeded to slide around at ease. Oh well, I left them on as the raised base looked nice. Next my dad, not trusting me with sharp nails I think, drilled three links into the wood. I looped over some brass wire for the links and fixed a basic chest and front legs base out of the thickest wire I had and created the spine out of a longer piece of thicker wire which I bent to arch like a fox in a seated position. I left the rest of the wire to attach the tail though I didn't know how I would do that yet.
Attached to the base of the spine and tail I folded another piece of thicker wire for the hind legs. I curved them over to bend at the knees when a fox is seated. I left a long piece of wire outstretched for the longer foot on the hind legs.

Working from top clockwise there is a piece of cardboard to catch rouge soldering drops, then the drill which is slightly out of shot which was used to just drill in 6 holes to loop the wire into the base. My sketchbook is next which has sketches of the body and shape of the model, and what pieces I would like to create to make up the model. The larger pair of scissors cut all thickness's of wood. The blue handled long nose pliers helped fold thinner brass wire tightly and in the photo above the pliers I am using there are thicker heavier ones for flattening out wire, creating accurate corners and bending thicker wire. The hammer hit the brass looped links into place and after the model there is a role of solder which I used to fix pieces that wouldn't be seen to make the model base sturdier. The tub with the blue lid is a wax which works as a flux when soldering.

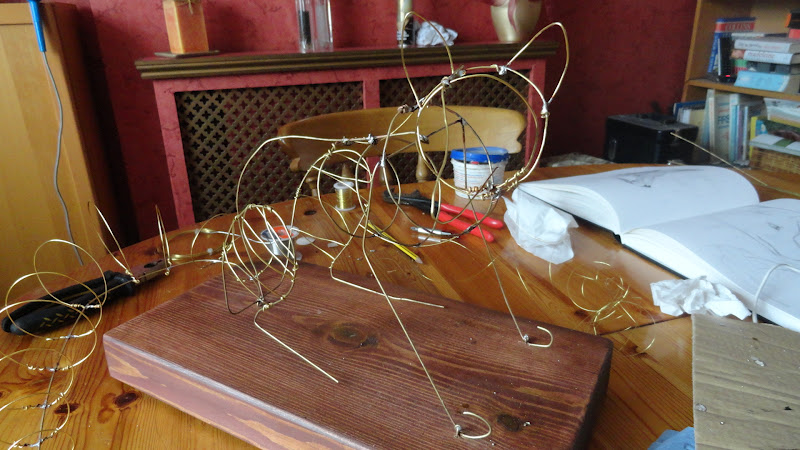
I couldn't work out how to create the ribcage. I had envisioned many pieces of wire like this, but thought to attach them it would be quite unstable. It would also be harder to keep the shape created by the 'spring' of wire.


So I made three hoops graduating in size. I attached the largest to the chest base created by the squared front legs. And then attached the other two the the spine base. I attached two pieces of wire to the top and bottom of the hoops where the head could be attached to.

I went through a few different versions of the head, at first it was a lot more complicated. But I found that as I had been simplifying a lot of the body, seeing it in front of me was beneficial as I could see how paper would attach and bend around. I realised I could create a lot of the structure of the head and features with paper and only needed a base to be able to attach the paper too. Originally the hoops were going to lay horizontally but with the position of the two attaching wires it was easier to attach them in the same direction as the rib cage.


The hoop idea seemed the best way for the tail in the end too. I created more hoops, starting medium and working up to large for the bushiest part of the tail and then gradually going down in size for the tip.

Adding the ears was actually really complicated. It was really hard to hold them at the right angle and twist the wire around at the same time. I accidentally broke off a bit of the wire on one of the ears and so soldered it on instead. After I'd done that I soldered the rest on, as it would hold better. I thought I would be able to adjust the angle of the ears with paper and use the wire as a guide.


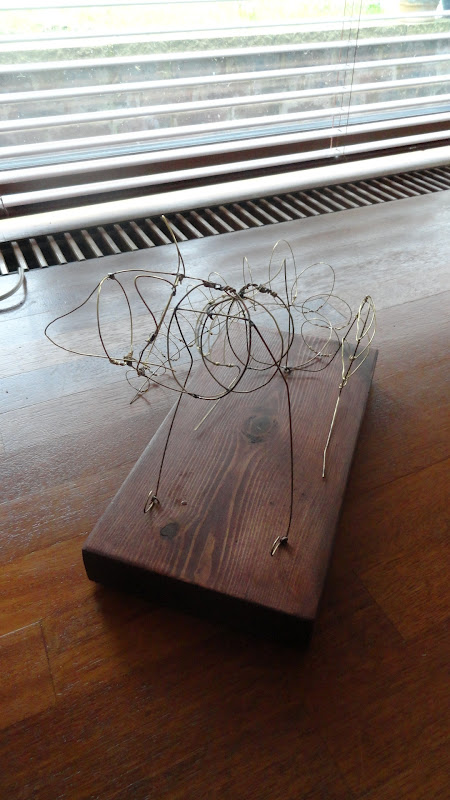

I took quite a few photos of the finished piece, in the room I was making it in there was too much background so I moved it into another room to photograph against a plainer background. Once I got back to university though I photographed it again against a white wall where you can see the wire and shape clearer.


This took place over 2 days and went without that much problems. I'm really pleased with the outcome and am looking forward to adding to it. It's pleasing for something to start of going well and has given me a lot more motivation for continuing with the hard work. We don't have that much long left now and I have to get on with creating my final images. I think I was delaying starting them as it's quite daunting to be in that position and I was still unsure about how to have my final pieces. It was having to make the decision to actually start something that would end up in my show. I'm glad I went for it though and as I said it went well. I'm pleased that I did 99% of it myself!

Subscribe to:
Posts (Atom)