I've begun creating the base for one of my final pieces. After experimenting with the brass wire I've been able to figure out ways of creating different pieces for the body of the fox model I am currently making. I decided that with all the planning I can do it's probably best to go ahead and start working. With previous knowledge of connecting paper and how to construct proportions reasonably well I thought it would just be best to get started and make adjustments as I went along. I had a rough assembled model of the shape of the figure I wanted to make at about a third the size so I could use that to estimate how long pieces had to be and adjust to the size of the wood base I had for it. Here is my journey through making it in photos.

This was done at my parents house where my dad is in the middle of building a new shed. His work involves going to building sites frequently and he has a lot of contacts with wood yards which got him these shelves for said new fence. It also got me this little off cut and varnish to paint over it. I left the sawing to my dad, who cut it down to size. Then it was sanded over lightly and sanded slightly more at the edges to curve them and make them look a little more professional. I found all equipment really easy to use; they were all my dads own tools and everything I had seen him use before.

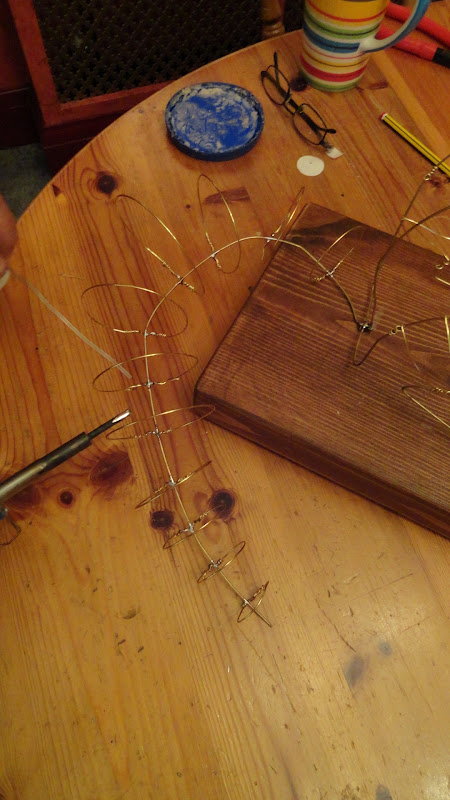
I found some 'non-slip' felt that is meant to go on the bottom of our sofas' to protect the wood flooring. I stole all I could find so I hope we don't lose any that are of the sofas protecting the floor at the moment. I stuck them on the bottom to raise the base, and placed it on the table where it proceeded to slide around at ease. Oh well, I left them on as the raised base looked nice. Next my dad, not trusting me with sharp nails I think, drilled three links into the wood. I looped over some brass wire for the links and fixed a basic chest and front legs base out of the thickest wire I had and created the spine out of a longer piece of thicker wire which I bent to arch like a fox in a seated position. I left the rest of the wire to attach the tail though I didn't know how I would do that yet.

Attached to the base of the spine and tail I folded another piece of thicker wire for the hind legs. I curved them over to bend at the knees when a fox is seated. I left a long piece of wire outstretched for the longer foot on the hind legs.

Working from top clockwise there is a piece of cardboard to catch rouge soldering drops, then the drill which is slightly out of shot which was used to just drill in 6 holes to loop the wire into the base. My sketchbook is next which has sketches of the body and shape of the model, and what pieces I would like to create to make up the model. The larger pair of scissors cut all thickness's of wood. The blue handled long nose pliers helped fold thinner brass wire tightly and in the photo above the pliers I am using there are thicker heavier ones for flattening out wire, creating accurate corners and bending thicker wire. The hammer hit the brass looped links into place and after the model there is a role of solder which I used to fix pieces that wouldn't be seen to make the model base sturdier. The tub with the blue lid is a wax which works as a flux when soldering.

I couldn't work out how to create the ribcage. I had envisioned many pieces of wire like this, but thought to attach them it would be quite unstable. It would also be harder to keep the shape created by the 'spring' of wire.


So I made three hoops graduating in size. I attached the largest to the chest base created by the squared front legs. And then attached the other two the the spine base. I attached two pieces of wire to the top and bottom of the hoops where the head could be attached to.

I went through a few different versions of the head, at first it was a lot more complicated. But I found that as I had been simplifying a lot of the body, seeing it in front of me was beneficial as I could see how paper would attach and bend around. I realised I could create a lot of the structure of the head and features with paper and only needed a base to be able to attach the paper too. Originally the hoops were going to lay horizontally but with the position of the two attaching wires it was easier to attach them in the same direction as the rib cage.


The hoop idea seemed the best way for the tail in the end too. I created more hoops, starting medium and working up to large for the bushiest part of the tail and then gradually going down in size for the tip.

Adding the ears was actually really complicated. It was really hard to hold them at the right angle and twist the wire around at the same time. I accidentally broke off a bit of the wire on one of the ears and so soldered it on instead. After I'd done that I soldered the rest on, as it would hold better. I thought I would be able to adjust the angle of the ears with paper and use the wire as a guide.


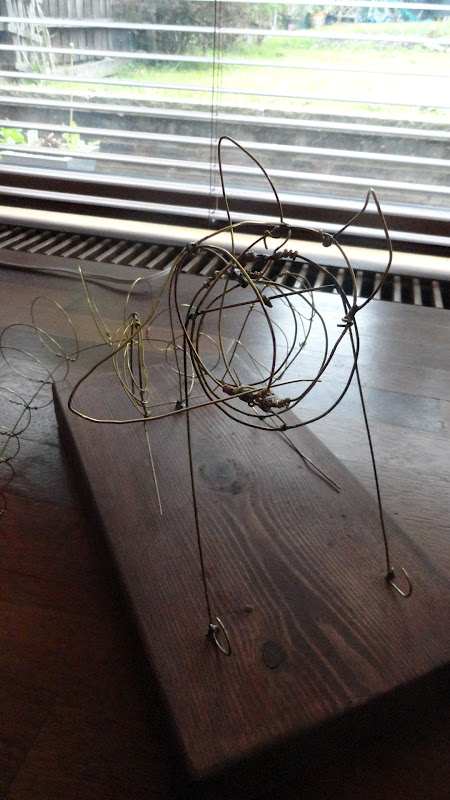


I took quite a few photos of the finished piece, in the room I was making it in there was too much background so I moved it into another room to photograph against a plainer background. Once I got back to university though I photographed it again against a white wall where you can see the wire and shape clearer.


This took place over 2 days and went without that much problems. I'm really pleased with the outcome and am looking forward to adding to it. It's pleasing for something to start of going well and has given me a lot more motivation for continuing with the hard work. We don't have that much long left now and I have to get on with creating my final images. I think I was delaying starting them as it's quite daunting to be in that position and I was still unsure about how to have my final pieces. It was having to make the decision to actually start something that would end up in my show. I'm glad I went for it though and as I said it went well. I'm pleased that I did 99% of it myself!

No comments:
Post a Comment